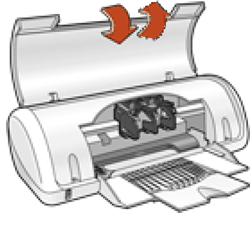
 The carriage of a printer is the assembly that holds the ink cartridges and slides back and forth to transfer ink onto printer paper. Paper jams can sometimes lead to carriage jams, especially after printing on thicker paper like an envelope. When the carriage stalls, you may hear a grinding noise as the printer attempts to move the carriage. The problem is that the actuator arm is stuck, which prevents the carriage from moving.
Instructions
1. Unplug the power cord of the printer and open the cover to reveal the carriage assembly.
2. Squeeze the two levers beneath the paper tray together to remove the tray.
3. Slide the carriage assembly from the left side of the printer to the middle where you have easy access to it. If the carriage assembly will not slide, complete Steps 4 through 6.
4. Push down the large black bar located directly above the rollers and then release it so that it springs back up. Now attempt to slide the carriage assembly to the right again. If it still does not slide, refer to Step 5.
5. Locate the flat black component found directly below the rollers in the tray compartment. It should be lying flat, parallel with the base of the printer. If it is pointing upward, push it down.
6. Slide the carriage assembly over to the right once all of the above parts are in their correct positions.
7. Lift the actuator arm, which is directly above the white and/or gray gear assembly at the left side of the printer. The actuator arm is thin strip of black plastic that is approximately 1 3/4 inches long and 1/3 inch wide. Lifting it and releasing it should restore it to its proper position.
8. Put the paper tray back in the printer. With the cover of the printer still open, plug in the power cord and turn on the printer.
9. Press and hold "Resume," then close the cover of the printer.
Source:- http://www.ehow.com/how_5326976_fix-carriage-jam-printer.html
Comments
Post a Comment